
NodeTool turns a one-line brief into a finished film through a pipeline you can inspect and steer at every step: a Director agent writes a typed screenplay, a storyboard renders cheap stills you pick from before video spend, each shot becomes a clip you can revise in place, and one click assembles the cut into the timeline editor for finishing and export.
The whole chain is drivable three ways: from the UI, from chat (the agent
uses the same ui_* tools), or from an external agent such as Claude Code
over MCP (nodetool mcp serve).
The workflow, end to end
(Director agent)"] stills["Stills
(cents)"] pick["Pick a still"] clips["Clips
(dollars)"] revise["Revise
(video-to-video)"] assemble["Assemble
timeline"] nle["Timeline editor
(trim, mix, captions)"] export["Export"] brief --> direct --> stills --> pick --> clips --> assemble --> nle --> export clips --> revise --> clips revise -. "round-trips into the cut" .-> nle
Cheap stages come first. A still usually costs far less than a clip, so you pick the still you like before paying for the clip. Each render dialog shows an estimate before you confirm. When you select a new clip take for a shot after the cut exists, the linked timeline clips pick up the new asset.
Start from a shipped board
New → New storyboard… (under Blank documents) opens a list with Blank storyboard and the example boards that ship with the install. The Storyboard entry under Guided flows in the same menu walks you through four steps (Idea, Story, Entities, Look) and ends on the rendered board. An example arrives finished: every shot already carries its action text, its still, and its clip, so the surface shows a directed sequence before you spend anything. The media are constant package assets, so installing one writes a single row and copies no bytes — regenerate any shot and the new render replaces the shipped one on that card alone.
Direct: brief in, screenplay out
Open a storyboard (New → New storyboard… → Blank storyboard), open
Board settings, write a brief and a style, pick an aspect ratio and a shot
count (3, 4, 5, 6, 8, 10, or 12), and press Direct. Once the board has
shots the button reads Re-direct, and it asks for confirmation because it
rewrites the screenplay and replaces every shot. The screenplay is typed:
title, logline, style bible, narration, music direction, and one structured
shot per card with action, camera (framing, lens, angle, movement, equipment),
motion, and duration. The board uses the same Director authoring prompt and
screenplay schema as the nodetool.creative.Director node, which you can also
place in any workflow graph (shot count 1 to 20, default 5).
Two sibling nodes make the screenplay usable inside any workflow graph:
nodetool.creative.ScreenplayShots streams each shot with a composed
image-generation prompt, and nodetool.creative.ApplyEntities injects entity
descriptors for consistency (below).
The storyboard: plan, pick a still, then spend
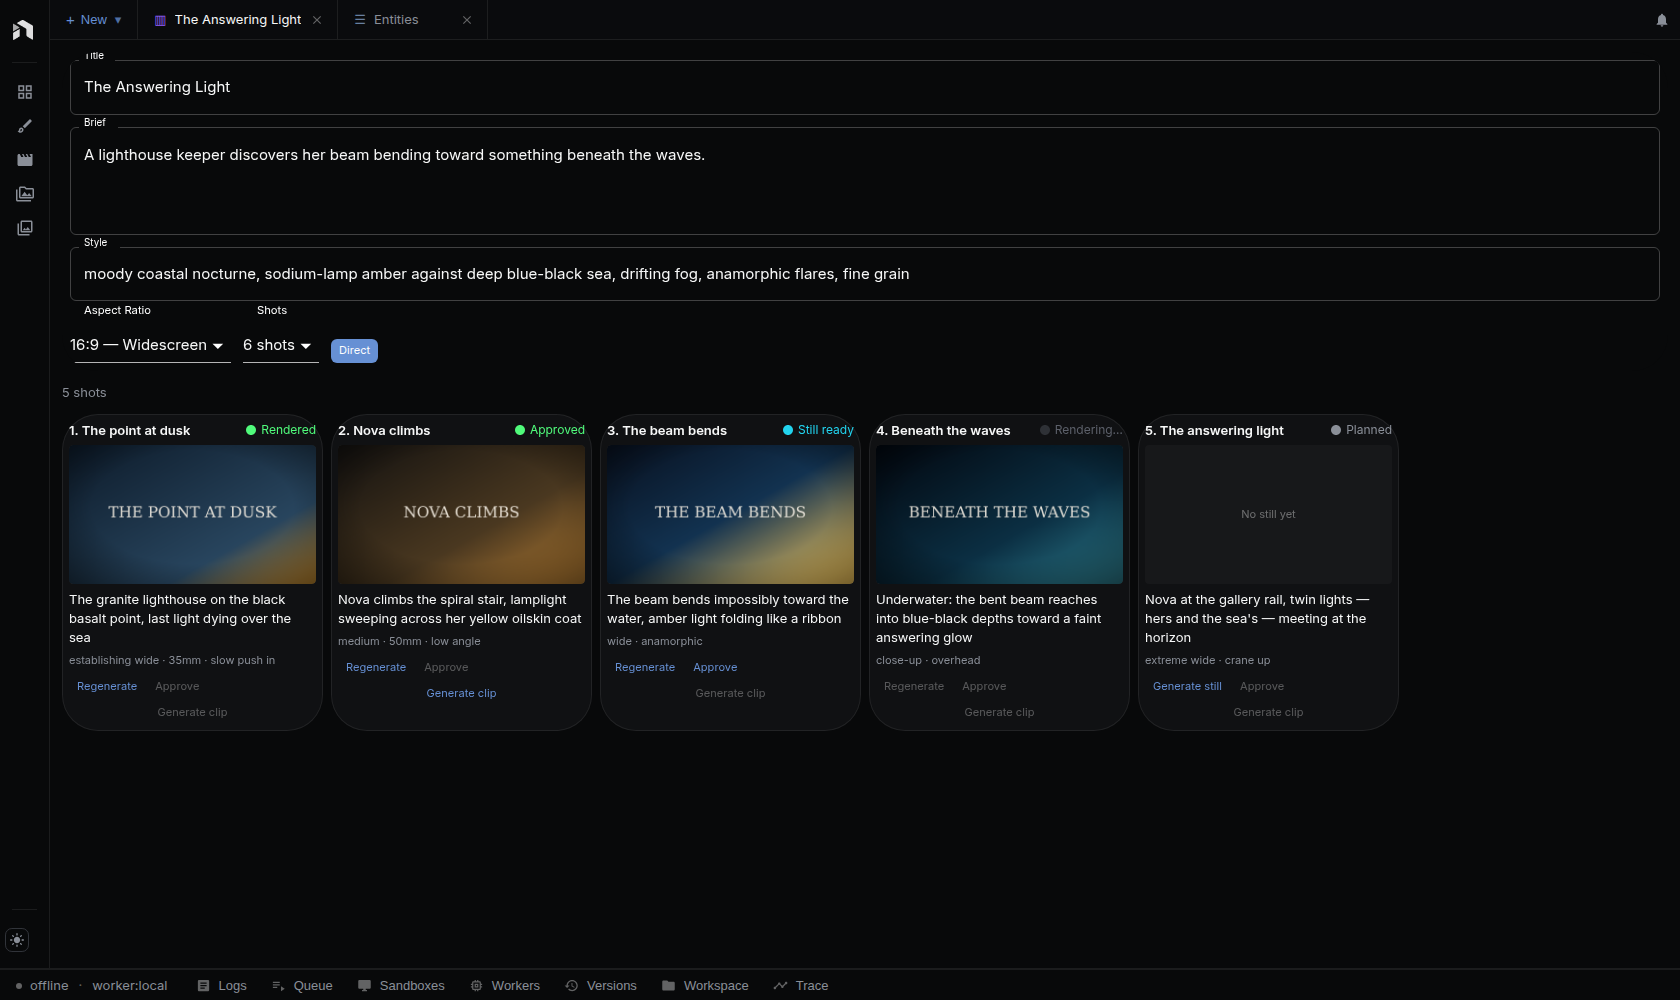
The board is a grid of shot cards. A card carries what reads at a glance —
the still or the clip, a shot label such as SH 03, a status pill, and the
action line. The toolbar has Render stills and Render clips buttons.
Each opens a dialog where you pick the model and see an estimated cost, then
confirm. Select a card and a footer docks under the grid with Edit,
Iterate, Regenerate, and Delete, plus an “Appears in” row of links
to the shot’s clip in the cut and its script line. Edit opens the shot’s
fields, still and clip takes, and script lines under its card, where you set
the current still or take. Iterate re-renders the current clip with a text
note (“make it darker, add rain”) and is disabled until the shot has a clip.
The status pill reads planned, still, still · clip queued,
rendering still, rendering clip, failed, or covered, with · stale
added when the style or models changed after the render. A shot with a clip
shows no pill. Fixing shot 3 never means re-rendering shots 1 to 5.
Agents drive the same surface through the ui_storyboard_* tools, among them:
get_state, direct, set_screenplay, set_entities, add_shot,
update_shot, generate_keyframe, generate_clip, revise_shot,
assemble_timeline, select_shot, extract_script, relink_script,
reproject_shots, and set_duration_source. The full set is registered in
web/src/lib/tools/builtin/storyboard.ts.
Assemble: from storyboard to timeline
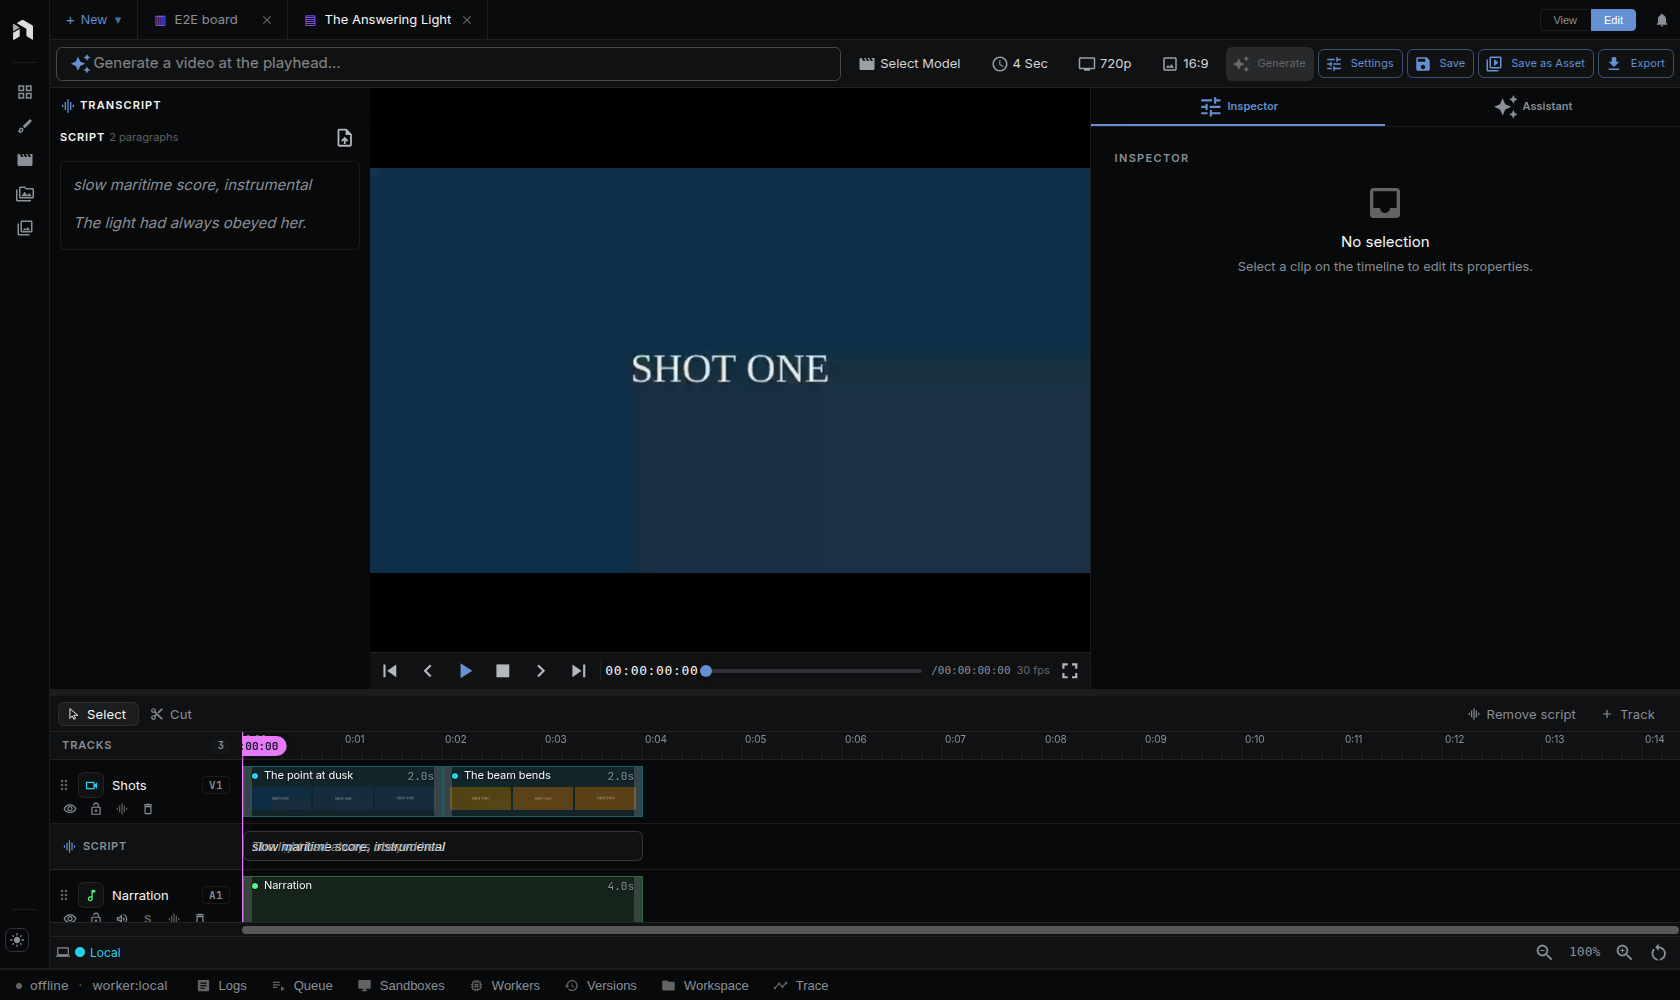
Create timeline (below the shot grid, enabled once a shot has a still or clip) turns the shots into a persisted timeline sequence and opens the editor. Shots lay end to end on a Shots video track at the length of the footage that came back, and a shot with only a still becomes an image clip. Each clip’s own sound goes on a linked Shot Audio track, and the screenplay’s narration and music become draft text-to-audio clips on Narration and Music tracks. A board linked to a script is cut jointly, so each voiced line gets its own voiceover clip and the editor shows a Script tab. Shots without an accepted clip are skipped. Timeline playback and export mix audio clips, never a video element’s track, so the shot-audio clips are how a video model’s dialogue and room tone reach the cut — mute one when a shot should play silent under narration. From here it’s a normal edit — trim, transitions, audio mix, captions — and export.
Every assembled clip stays linked to its shot. Select a new clip take for a shot afterward and the new asset replaces the one in the persisted cut. Once a timeline is linked, the button reads Rebuild linked timeline… and asks for confirmation, because rebuilding replaces every clip the storyboard owns, including trims made to those clips. Tracks and clips you added yourself are kept. The storyboard plans, the timeline finishes, and revisions flow forward.
Entities: reusable ingredients
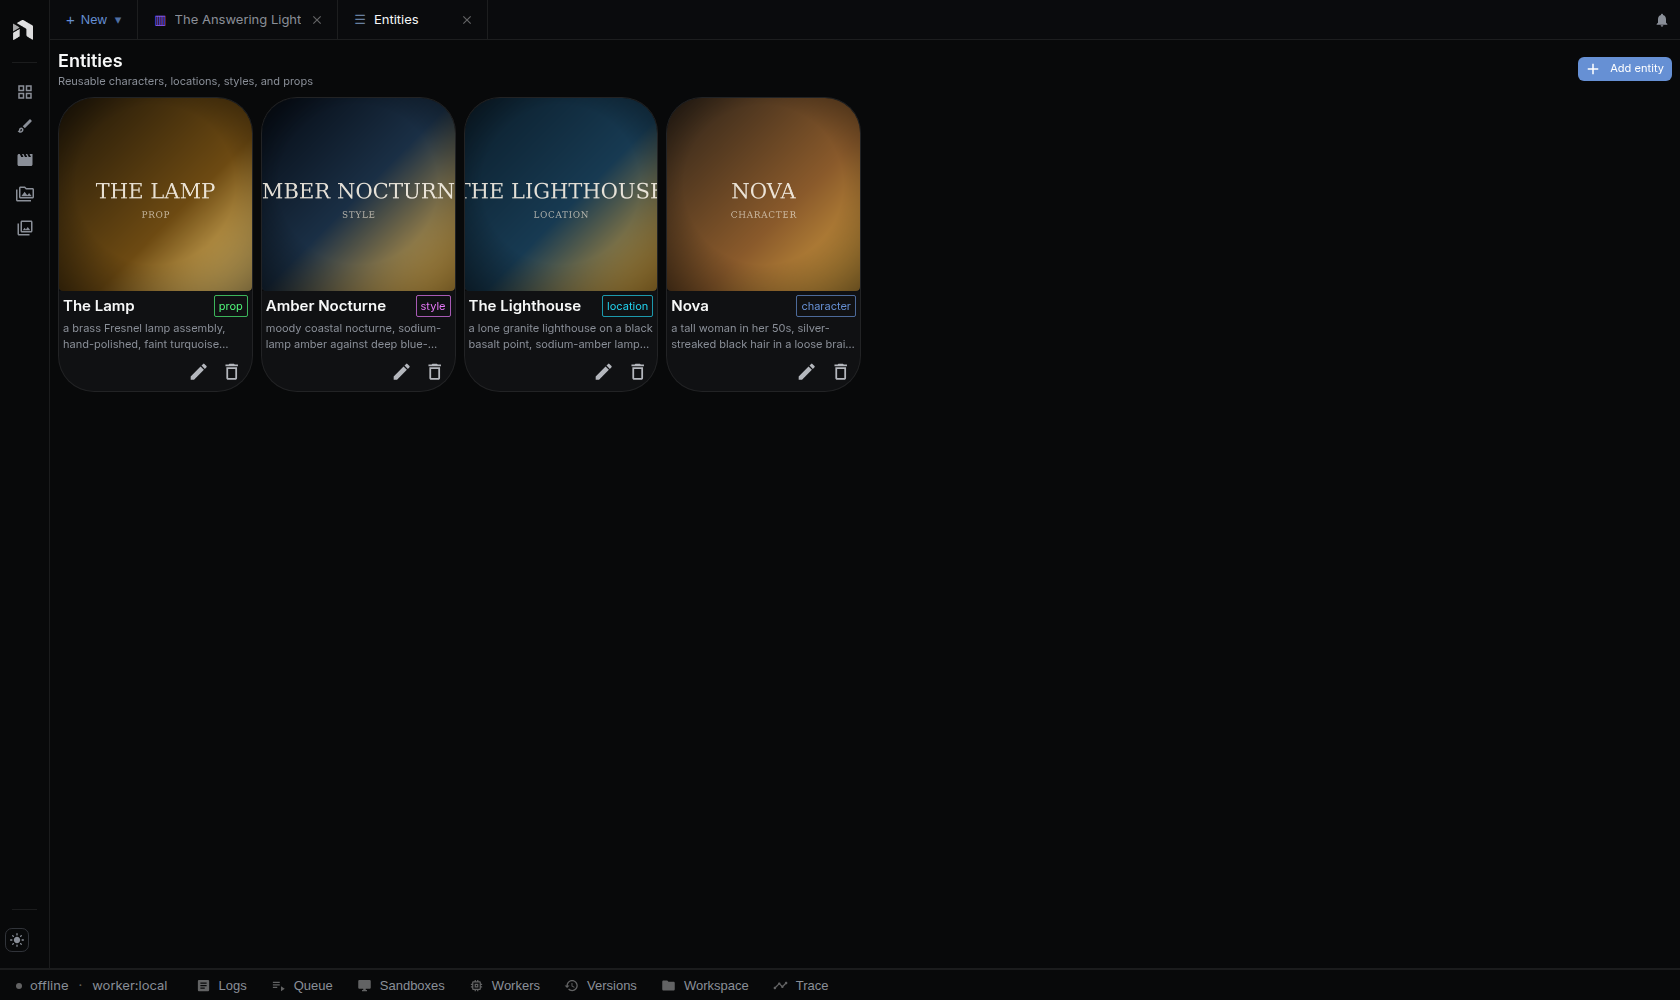
Characters, locations, styles, and props are named, reusable objects. The Entities page covers creating and editing them. Tag any
image asset with a kind, a name, and a canonical descriptor (voice id and
tags are optional) — the exact
sentence pasted into every prompt that names the entity. That verbatim
descriptor is what holds a character’s look steady across shots. Entities
live in the asset library (a metadata marker, no migration), appear in the
Entities panel in the left sidebar and the full-page library (Add entity), and reach prompts through the ApplyEntities
node or the ui_entity_apply tool.
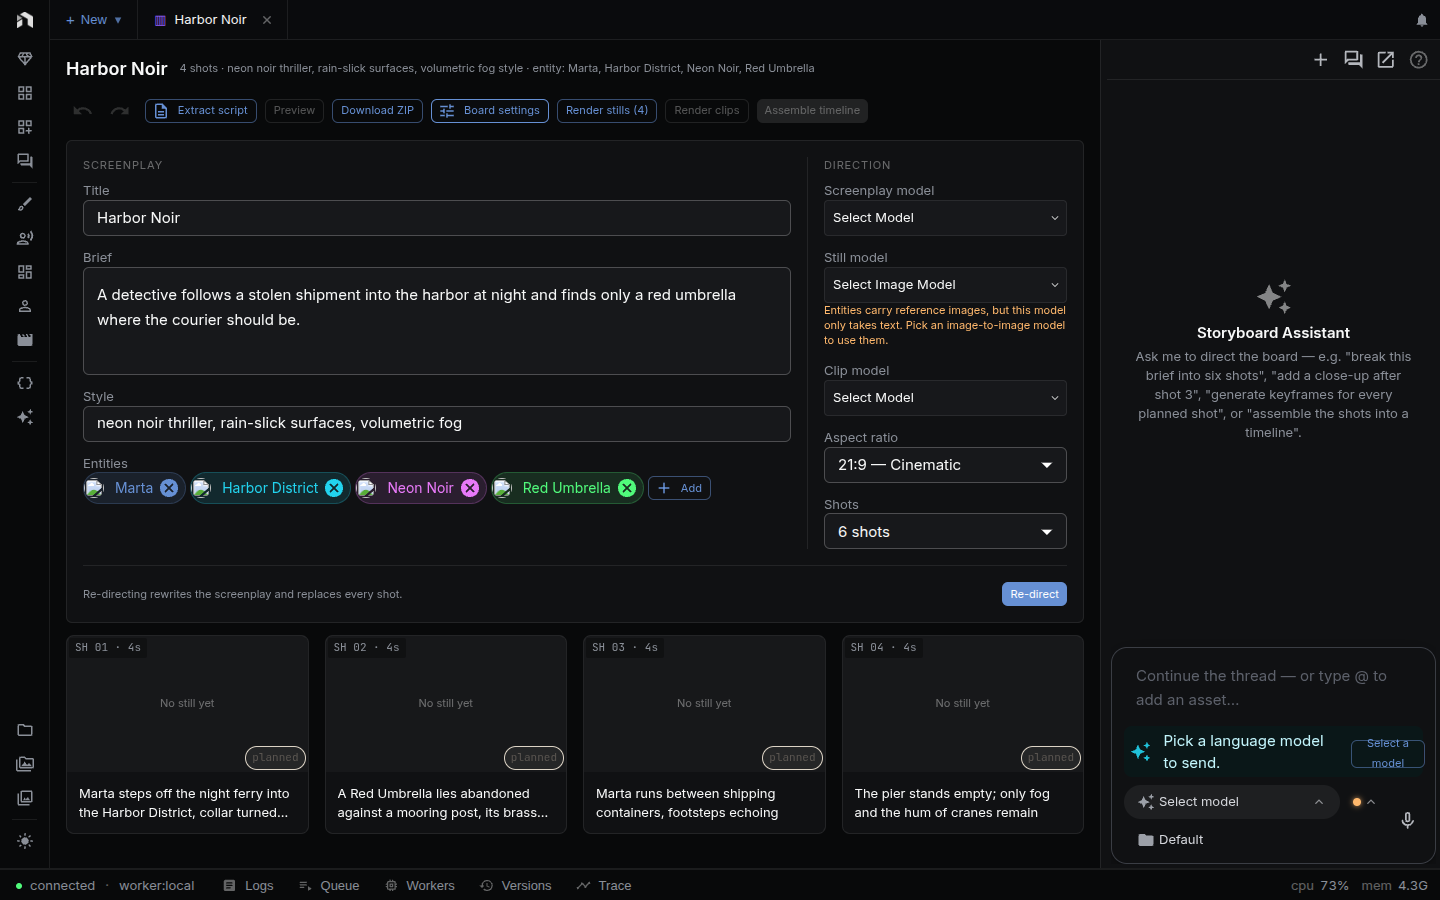
On a storyboard, the Entities field — under Board settings — pins a cast to the board: styles and locations season every shot’s still and clip prompt, while characters and props activate on the shots that mention them by name. Open a shot with Edit and the board’s entities show as chips. Click one to include or exclude it for that shot. The Direct run also hands the cast to the screenplay model so shots reference entities by their exact names.
Entities are also one @ away wherever prompts are written: the mention
picker in the chat composer and the workflow editor’s Prompt node lists them
first, and a picked entity carries its descriptor and reference image into
the generation.
Cost governance
Spend is shown before you commit it. The storyboard’s Render stills and
Render clips dialogs, and the per-shot cost line, price the request before
you confirm and say how many requests could not be priced. In the workflow
editor, the Cost estimate section under the Inspector prices the graph
before it runs. It uses per-node fal and kie unit pricing and model price
lookups, counts fan-out properties such as num_images, num_outputs,
num_samples, and batch_size, and lists nodes with no known price as
unknown instead of hiding them. Caps are per agent run (a USD cap on a chat
turn and its sub-agents) and per published mini app (a spend budget). How
NodeTool estimates, records, and limits spend is described in
Costs and credits.
Graph templates
The same pipeline ships as workflow templates for batch runs with no surface interaction:
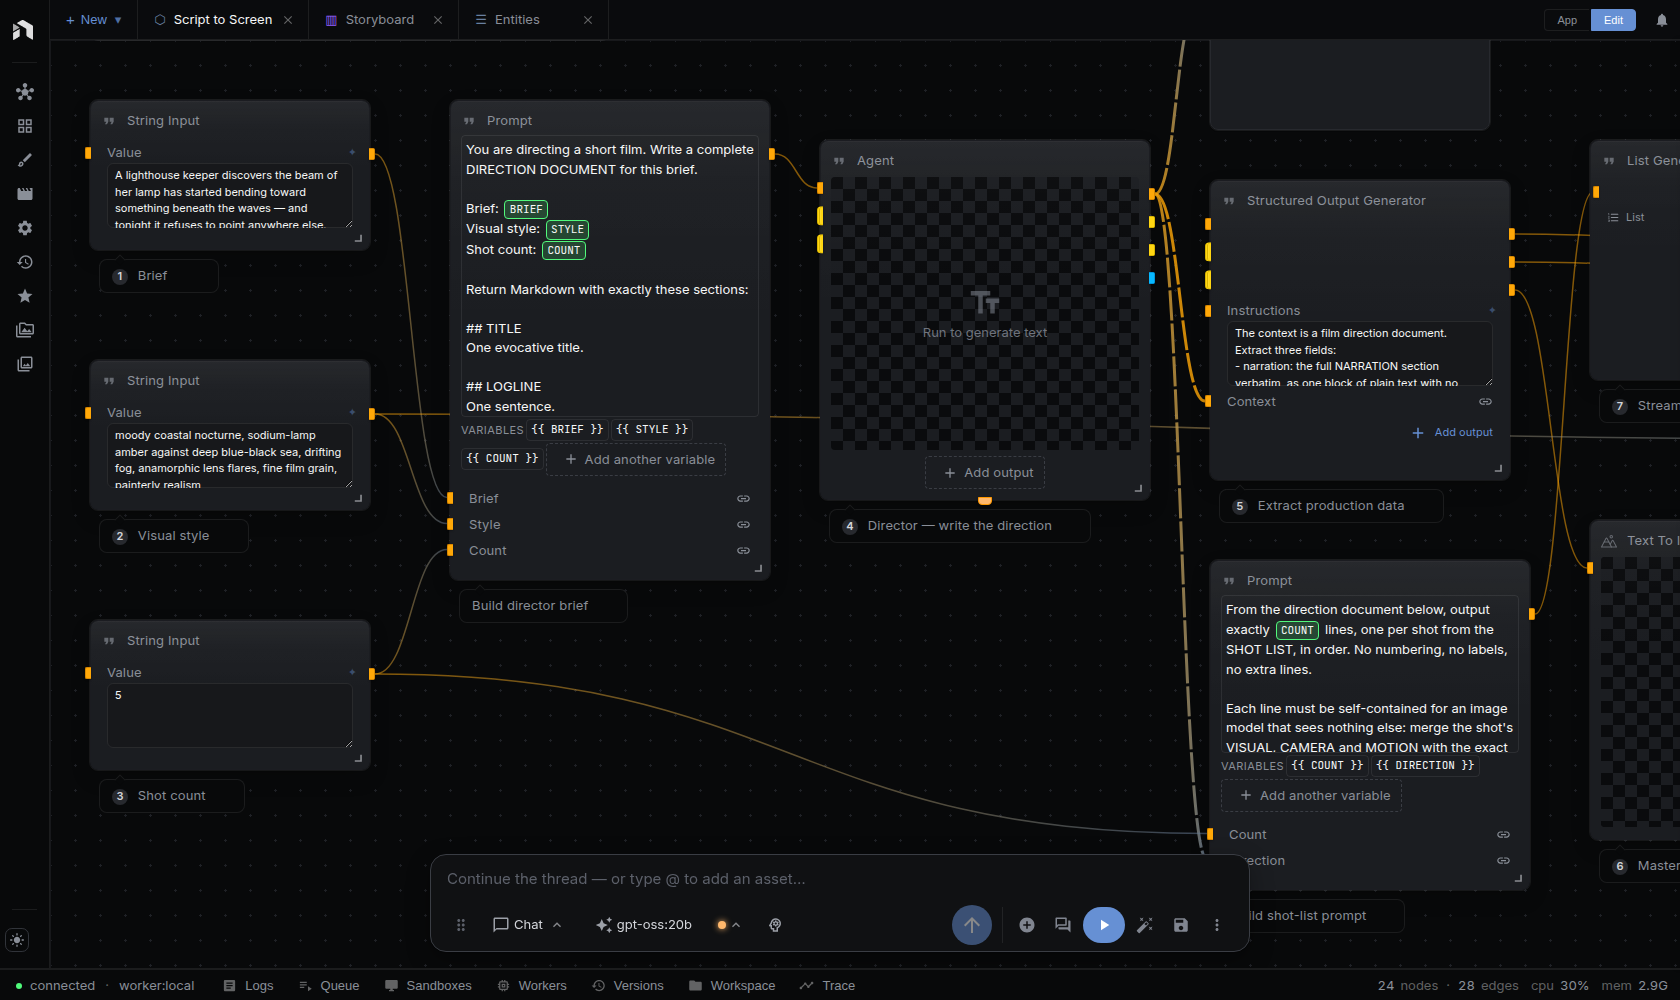
- Script to Screen — brief → direction document → style-frame-anchored keyframes → per-shot animation → cut with voiceover and score (Concat assembly).
- Directed Film to Timeline — the same direction assembled onto the
timeline with
nodetool.timeline.AddClips → RenderTimeline.
For continuity across cuts, nodetool.creative.ShotChain generates clips
sequentially, extracting each clip’s last frame to seed the next shot.
The approved document as a graph value
Those templates direct from a brief. The nodes below start from a document a person already approved and re-run it — a board per SKU, a script per language, a cut per aspect ratio — without re-directing anything. A ref is read-only unless the run derived it, so a batch cannot draw over the template.
| Node | Takes | Gives |
|---|---|---|
nodetool.constant.Storyboard / .Entity |
a picked board or entity | storyboard / entity |
nodetool.entity.LoadEntity |
entity, or a name and kind |
entity, descriptor, name, kind, reference_image, voice_id |
nodetool.entity.ListEntities |
kind, tags, name_contains, project |
entities; streams one entity per row |
nodetool.entity.CreateEntity |
image, kind, name, descriptor, key |
entity, created — upserts on key, so a re-run reuses the row |
nodetool.storyboard.LoadStoryboard |
storyboard |
shots, entities, style, aspect_ratio, name, both models, shot_count |
nodetool.storyboard.StoryboardShots |
storyboard |
streams shot, index, slug, keyframe, clip |
nodetool.storyboard.CreateStoryboard |
screenplay (from Director), name, cast, both models, reuse_existing |
a new writable storyboard, shots, created — a re-run returns the board it made |
nodetool.storyboard.RecastStoryboard |
storyboard, cast, replaces, reuse_existing |
the copy, invalidated, kept — keeps every frame whose prompt did not move |
nodetool.storyboard.RenderStills |
the derived storyboard, targets, max_shots, only_stale |
keyframes, rendered, skipped, failed |
nodetool.storyboard.RenderClips |
the same, plus require_keyframe |
clips, rendered, skipped, failed |
nodetool.storyboard.AssembleTimeline |
the derived storyboard |
timeline, skipped_shots, retimed — a copy inherits the template’s cut, titles and music |
nodetool.script.WriteScript |
model, brief, format, cast, language |
a new script, line_count |
nodetool.script.FillScript |
script, values |
a new script, filled, unresolved |
nodetool.timeline.FillTimelineText |
timeline, values |
a new timeline, filled, unresolved |
nodetool.timeline.RetargetTimeline |
timeline, aspect_ratio, fit |
a new timeline, cropped |
nodetool.game.LoadGameTemplate |
template |
manifest, slots; streams one slot |
nodetool.game.SlotPrompt |
slot, style, cast |
prompt, width, height, kind, checker, seconds |
nodetool.game.StageGameAssets |
template, game_id, fills |
bindings, paths — candidates for a native game revision |
RenderStills, RenderClips and AssembleTimeline refuse a board this run
did not derive; allow_writes is the per-node override for a graph whose whole
purpose is to render the board a person picked. Four shipped examples wire
them: Per-SKU Ad Factory, Localized Explainer, Top-down Native Asset
Pack, Three Ratios.
Driving it from outside
nodetool mcp serve exposes NodeTool over MCP (stdio) as an execute_code
action tool plus a small set of direct tools. Inside an action, the same
capabilities the chat agent has are available, including the storyboard,
script, entity, and timeline tools, so an external agent can search nodes,
build and run workflows, and generate media. nodetool mcp install writes the
config for Claude Code, Codex, or OpenCode. See NodeTool as an MCP Server. Inside NodeTool, the chat agent reaches every surface
through the same frontend tools the buttons use.